This application will receive the California Energy Commission (CEC) grant funded Zero Emission Vehicle (ZEV) infrastructure data. Specifically, it accepts Program Management, Utilization, and Reliability data, as submitted by Charging Network Providers (CNP) or Block Grant Implementer.
Please review the Data Dictionary and submit the required data in the format of the provided templates in the latest Utilization and Reliability Data Dictionary and Templates.
Step 1: Log in to DSP
Log in to the Data Submission Portal (DSP).
Note: if you are not registered for the DSP, first navigate to Data Submission Portal Registration before continuing.
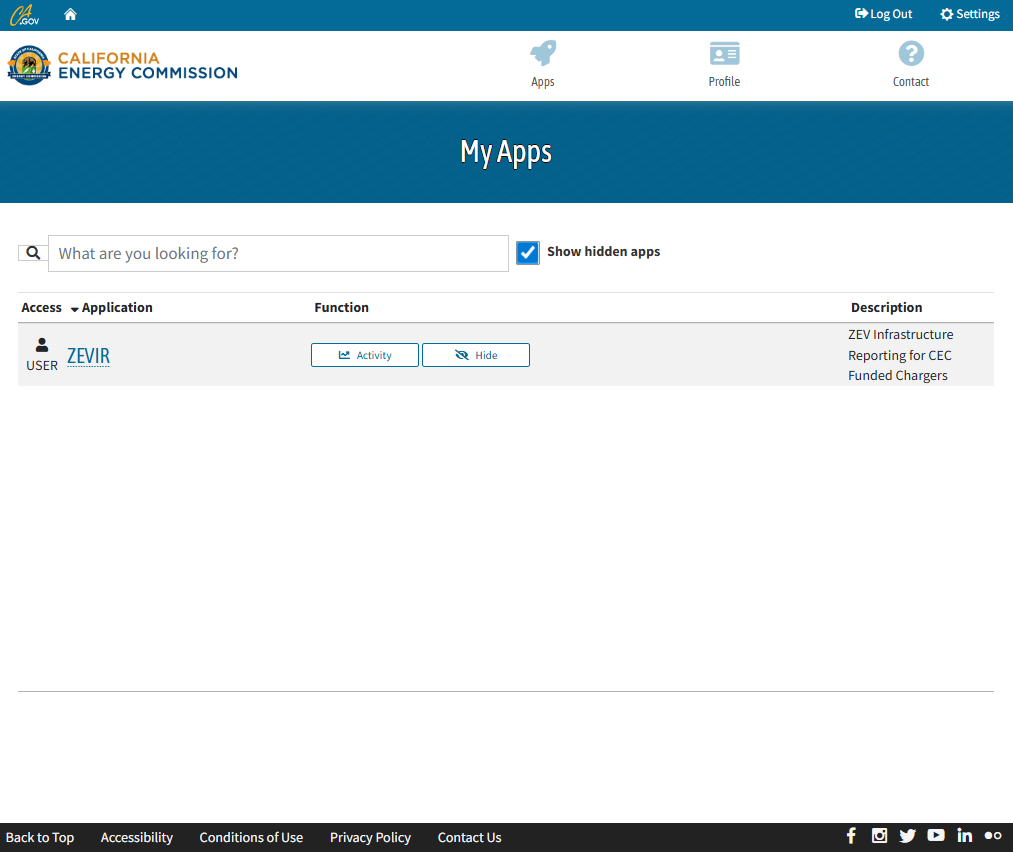
Step 2: Select "ZEVIR"
Select “ZEVIR” application under “My Apps”. If ZEVIR does not appear under “My Apps”, select “Show hidden apps” to reveal the application, then request access to the ZEVIR-CEC app.
Step 3: Review Application Landing Page
Review application landing page titled, “CEC Funded Zero Emission Vehicle Infrastructure Reporting (ZEVIR)."
- This landing page contains high level information on the required data submittals.
- Refer to the Utilization and Reliability Data Dictionary and Templates link above to submit required data.
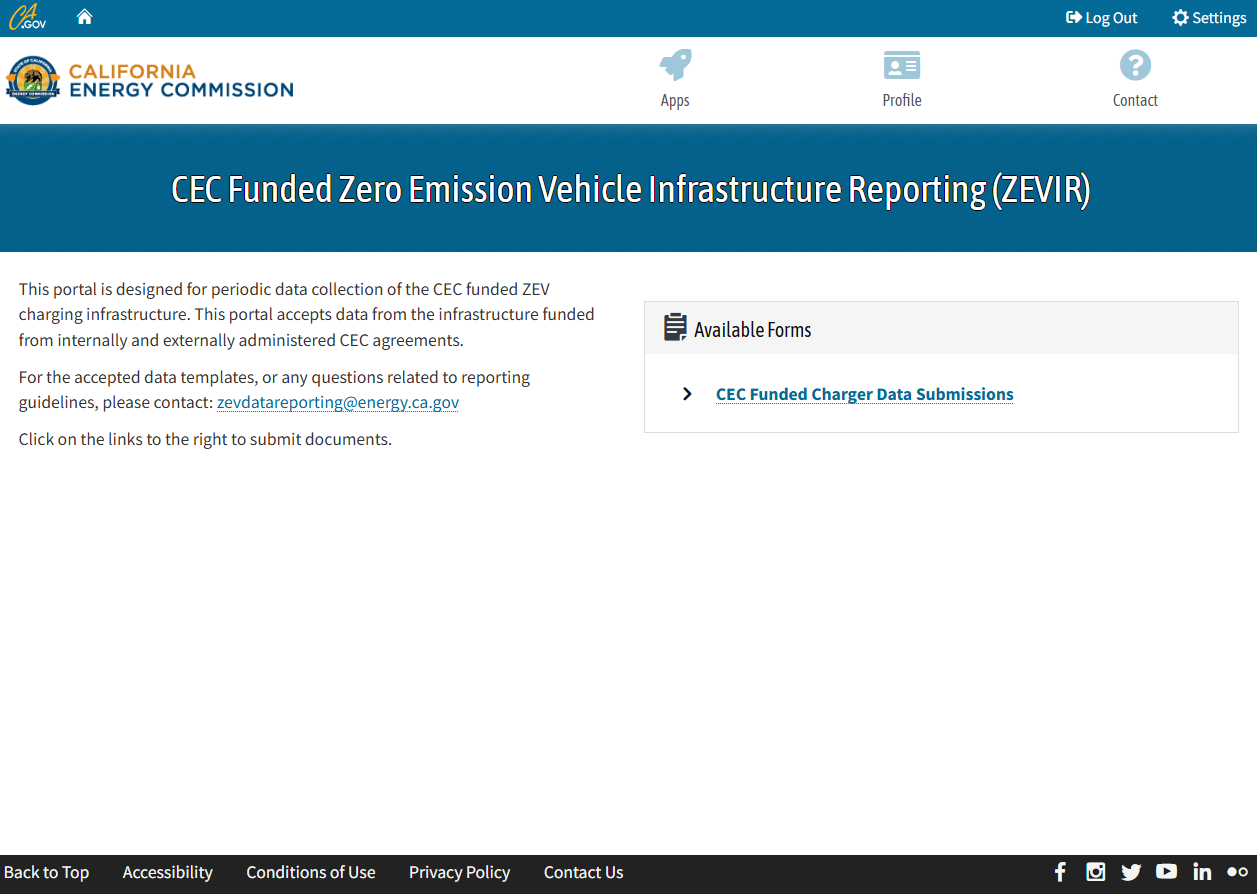
Step 4: Click "CEC Funded Charger Data Submissions"
Click on the “CEC Funded Charger Data Submissions” link under “Available Forms” to start submission process.
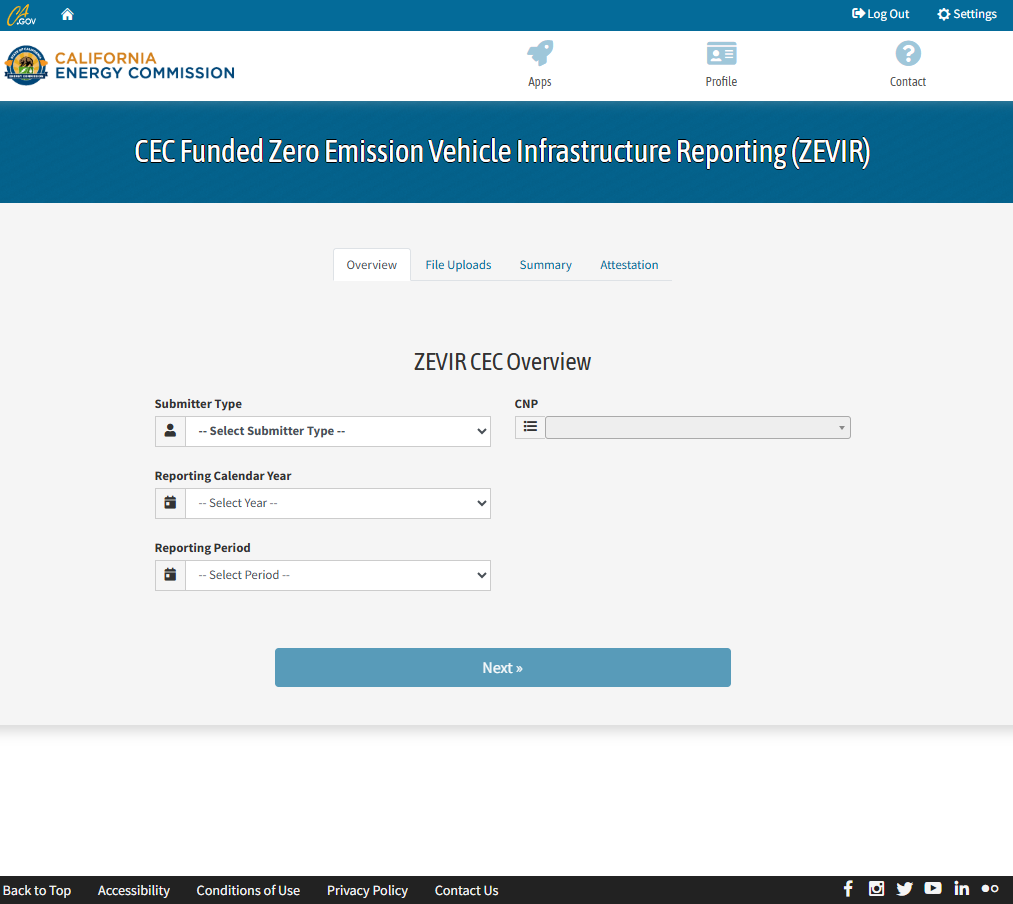
Step 5: Complete "ZEVIR CEC Overview" Form
Complete “ZEVIR CEC Overview” form:
- Select “Submitter Type” from the drop-down options. This selection should reflect the entity type in which the submitter is reporting data on behalf of. Depending on the selection of “Submitter Type," it will determine which file uploads are required.
- If you are unaware of your “Submitter Type," please email us for more information.
- If “Charing Network Provider” is selected as the “Submitter Type,” select the applicable “CNP” name from the dropdown menu.
- Select “Reporting Calendar Year."
- To reflect the year of data submission. If providing more than one year of data, please select the most recent year.
- Select “Reporting Period."
- To reflect the quarter of data submission. Select “yearly” for multiple quarters of data.
- Click “Next."
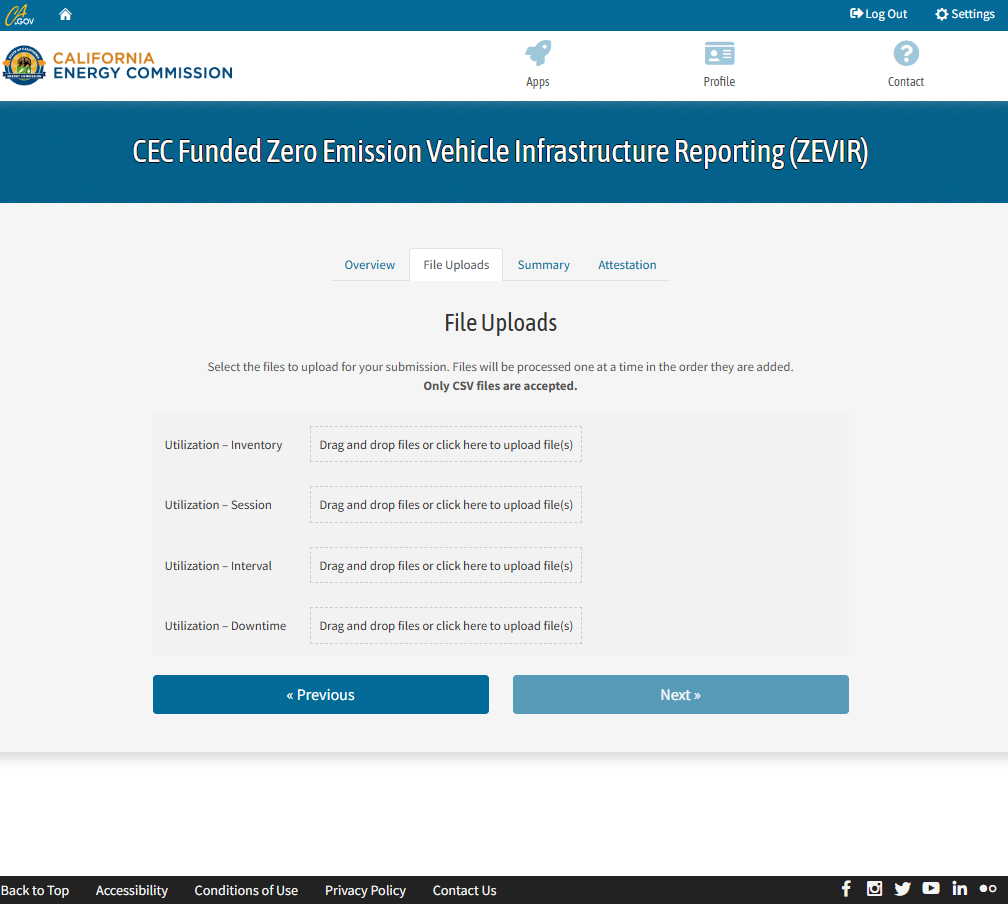
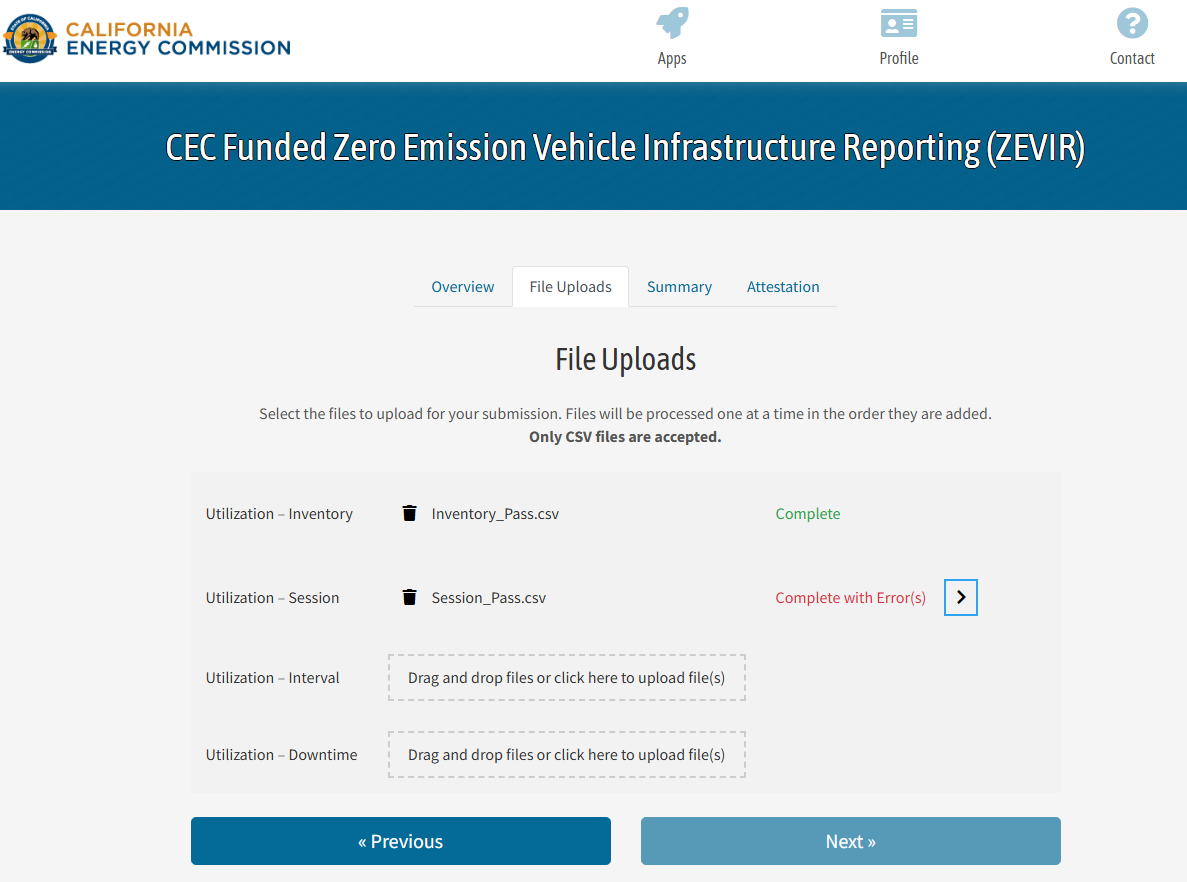
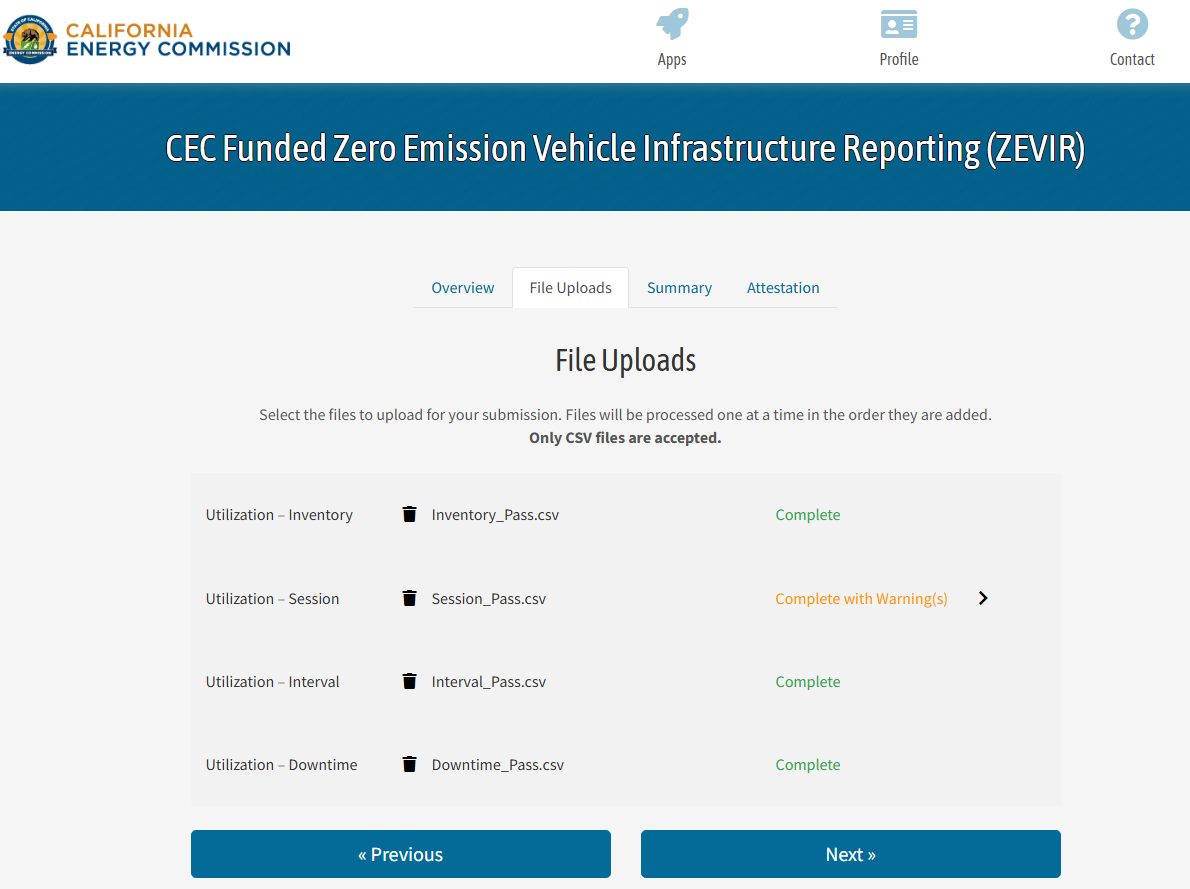
Step 6: Add Files
Either drag and drop or click within the corresponding box to upload the corresponding csv template to begin submission.
Note: All files must pass validation to proceed. If a file does not pass validation, then error or warning messages will appear with the option to download the detailed error or warning list.
Step 7: Review File Validation Messages
If a file is submitted with errors or warnings, then a message will appear. Select the arrow to the right of “Complete with Errors," highlighted in a blue box. A summary list of errors and warnings will appear. Select “Download Complete Warning/Error List” to view the errors and warnings in detail.
Note: The files may pass validation with warnings but will not pass with errors.
Step 8: Successful Upload
When all files are uploaded successfully, click “Next” button.
Step 9: Review
See ZEVIR Summary page. Review the summarized data of file submissions.
Step 10: Next
When ready to move to the next page, click “Next."
Step 11: Submit
Complete the Attestation form, click “Submit."
Step 12: Success
Redirect to a successful submission page.
Step 13: Confirmation Email
Receive confirmation email.